MS Teams
MICROSOFT TEAMS IN ODEL - THE BASICS
On this page
Overview
Use Cases For MS Teams
Setting Up Teams Link in ODeL
TIPS for Teaching with MS Teams
What is MS Teams?
Teams is an online collaboration tool from Microsoft. A ‘team’ is a dynamic workspace that allows members work together and interact in one place. A team is made up of ‘channels‘ in which you and your students can:
- Post chat messages and have conversations,
- Store and share links, images and files,
- Hold meetings for interactive sessions and presentations,
- Be notified about activity.
IMPORTANT : Moodle users with Microsoft 365 accounts can create Teams meetings from within Moodle for free. Teams meetings can be created using the Atto Editor in Calendar, Assignments, Forum posts or wherever else Atto Editor is available. Lecturers can create an audio or video meeting from Moodle.
This plugin allows to create the meeting and automatically insert the meeting link into the editor content.
Use Case for MS Teams With Students
(for example, seminars)
Links to interactive online sessions must be displayed in Moodle modules. See How to make online interactive sessions available to students for general advice on procedures
MS Teams offer the ability to create breakout groups. See the article - Breakout Rooms in Microsoft Teams
If you require a webinar solution featuring auto live captioning Teams offers this functionality.
(for example, to record quick and simple lecture presentations)
ODeL provides guidance for MS Teams: Making a recording.
NOTE: Poor internet connectivity will affect quality of the recording – see internet connectivity and key considerations before making a Teams recording.
For more recording options; see Recording tools for university staff and a useful Features comparison of PowerPoint vs Teams recording
(for example, Group work and file sharing)
Staff can request a new Team space for informal use with students; with the option to auto-enrol members from a single module code and/or manually add Team members.
Where the space is used for Teaching and Learning, it is recommended that a member of staff is the Team ‘owner’. Note; ‘essential’ learning content must be shared via Blackboard.
Team owners can assign members to specific channels for collaboration, these can be made private to restrict access.
Team channels have their own ‘open’ meeting room, which can be joined at any time by Team members (or channel members only, if set to ‘private‘). The channel meeting room posts a historical meeting chat/file sharing to the channel feed, after the meeting has ended.
Students can access their Teams space or channel meeting rooms by:
- setting up the Teams mobile app,
- via the automatic email notification received when added to a new Team
- Team owners can copy a joining link (for example, a link for joining a Team, specific channel or a channel meeting room), and displaying on their Moodle module. This will ensure all students have a central hub through which to access collaborative working, group work or projects occurring on Teams.
Procedure for Adding an MS Teams Meeting Link to a Moodle Course
Step 1: Ensure the Atto Teams Plugin is Enabled
- Log in to your Moodle account and access the course where you want to add the Teams link.
- Turn on the editing mode by clicking the "Turn editing on" button.
- Navigate to the text area where you want to insert the Teams link (e.g., in a course section, label, or page).
- Ensure that the Atto Teams plugin is installed and visible in the text editor toolbar. You should see a Teams icon in the editor.
Step 2: Insert the Teams Link
- Click on the Teams icon in the Atto editor toolbar.
- A pop-up window will appear, prompting you to insert the Teams meeting link.
- Paste the Teams meeting URL into the provided field.
- Optionally, enter a display name for the link.
- Click "Insert" to add the link to your Moodle course content.
Step 3: Save Changes
- Once the Teams link is inserted, save your changes by clicking "Save and return to course" or "Save and display," depending on the context.
- The Teams link will now be visible to students in the specified course area.
Step 1: Create a Meeting in MS Teams
- Open MS Teams and go to the "Calendar" tab.
- Click "New meeting" to schedule a new meeting.
- Fill in the meeting details, including the title, date, time, and participants.
- Once you have completed the details, click "Save" to create the meeting.
Step 2: Copy the Meeting Link
- After the meeting is created, open the meeting details.
- Copy the "Join Microsoft Teams Meeting" link provided in the meeting details.
Step 3: Add the Link to Moodle
- Log in to Moodle and navigate to the course where you want to add the Teams link.
- Turn on editing mode.
- Select the section or resource (e.g., a label, page, or section description) where you want to add the link.
- In the text editor, paste the copied Teams meeting link.
- Optionally, format the link text or add additional instructions.
- Save your changes.
Step 4: Inform Students
- You may want to send an announcement or notification to your students, informing them about the upcoming Teams meeting and where they can find the link in the course.
Step 1: Create a Teams Class
- Open MS Teams and click on "Teams" in the sidebar.
- Click "Join or create team" and select "Create team."
- Choose the "Class" option.
- Fill in the team name and description, then click "Next."
- Add students by entering their email addresses or inviting them later.
Step 2: Generate a Team Link
- Once the class team is created, go to the team and click on the three dots ("...") next to the team name.
- Select "Get link to team."
- Copy the link provided.
Step 3: Add the Team Link to Moodle
- Log in to Moodle and go to the course where you want to share the Teams class link.
- Turn on editing mode.
- Choose the section or resource (e.g., a label, page, or section description) where you want to add the link.
- Paste the copied Teams class link into the text editor.
- Optionally, format the link text or provide additional instructions for students.
- Save your changes.
Step 4: Guide Students on How to Join
- Provide students with instructions on how to join the Teams class using the link provided in Moodle.
- Consider sending an announcement or notification with the same instructions to ensure all students are aware.
IMPORTANT:
- visiting lecturers/students may not have a AIU email address, yet they are indeed entitled to get MS Teams access through their AIU ID. In this case, the instructor needs to add the student with their AIU ID (name.lastname@aiu.ac.ke) on Teams, like for any other student.
- After you have set up the meeting link, please remember to instruct your students, before your first class, on how they can attend class from remote using the link you have created on Moodle.
TIPS for Teaching with MS Teams
Below, we’ve listed the best (& easiest!) Teams tips for before, during and after a meeting to help transform your classroom without changing the way you teach.
Microsoft Teams Tips for Before Class
To ensure that students do not unmute themselves, change your meeting settings.
To
do this you must be the meeting organizer. Edit your upcoming meeting,
and click on the Meeting Options. A new window will pop up with
customizable options. Switch “Allow attendees to unmute” to “No.” Then,
set who can present to “Only me.”
Quick Tip! Control+Shift+M to quickly mute and unmute your mic.

To ensure that students do not unmute themselves, change your meeting settings.
To do this you must be the meeting organizer. Edit your upcoming meeting, and click on the Meeting Options. A new window will pop up with customizable options. Switch “Allow attendees to unmute” to “No.” Then, set who can present to “Only me.”
Quick Tip! Control+Shift+M to quickly mute and unmute your mic.
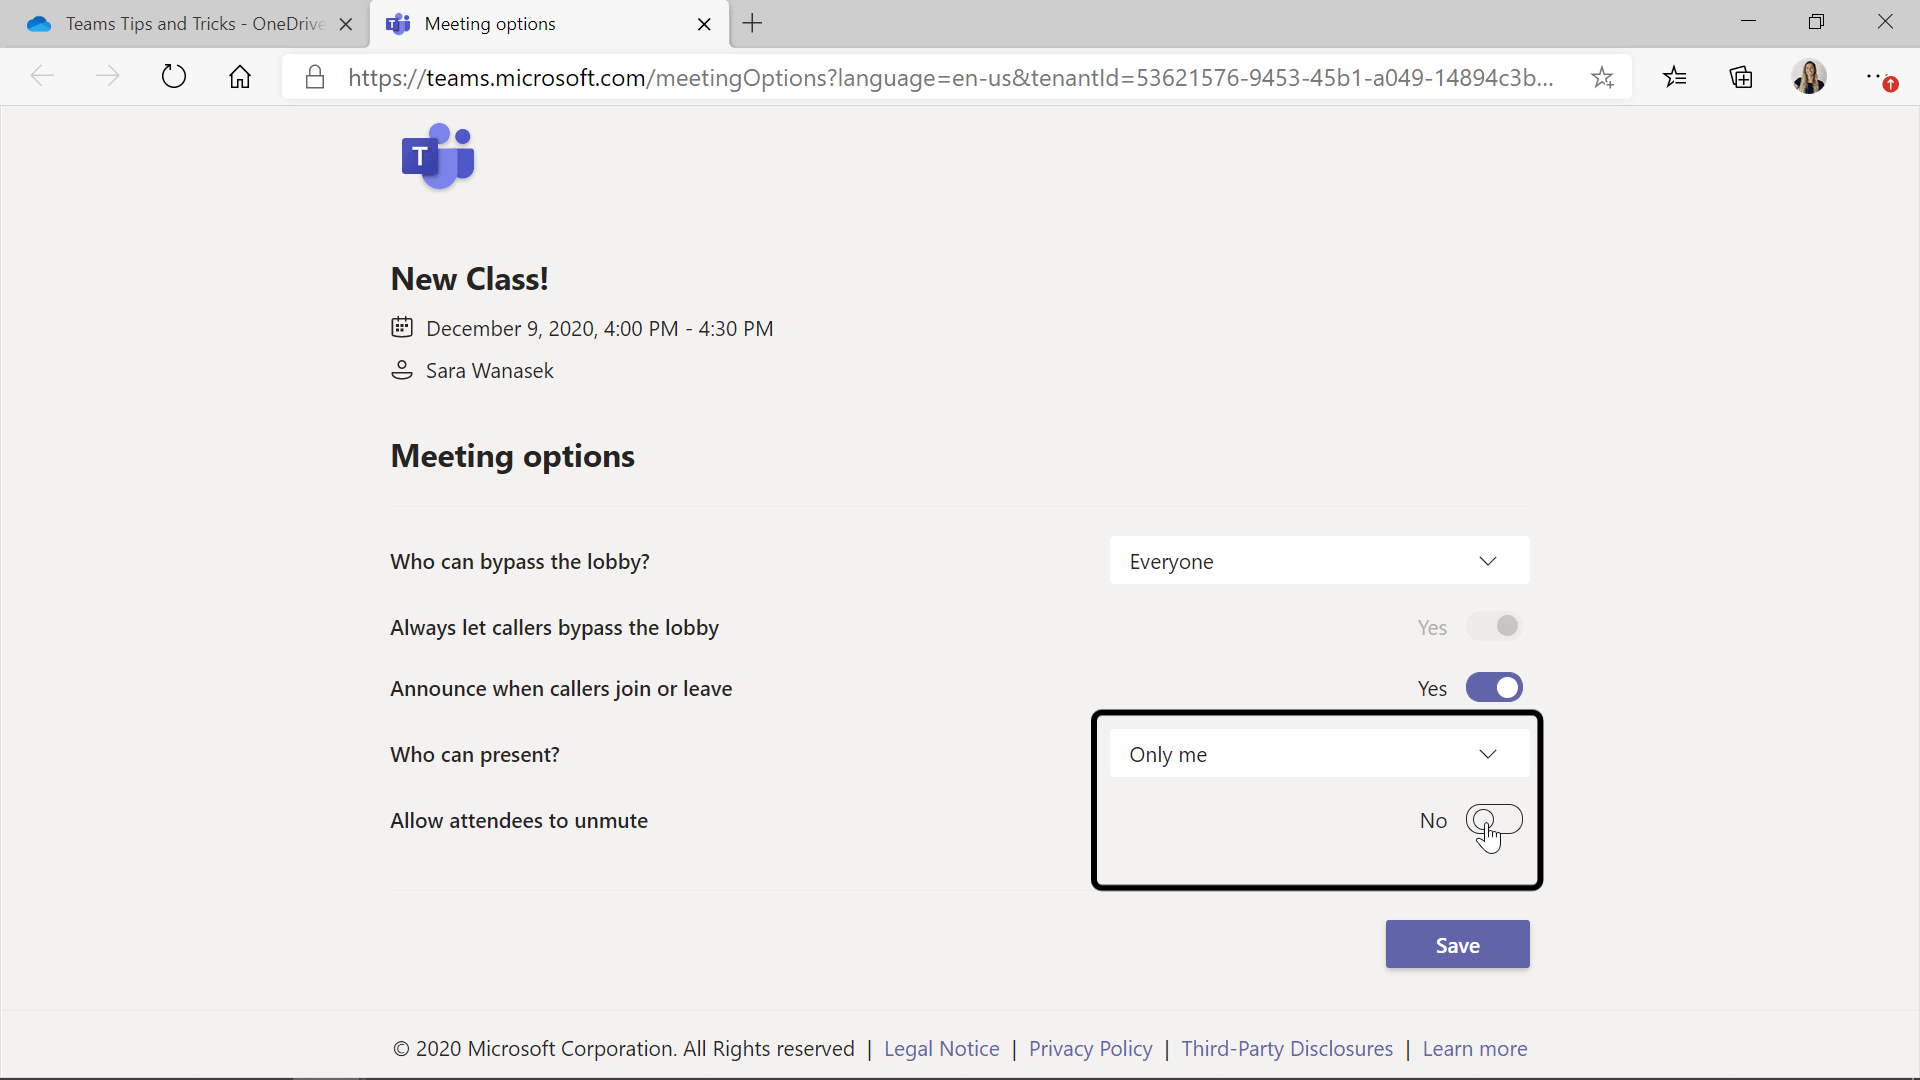
If you have a co-teacher or a student you know will be presenting in class, you can set up your meeting so that only that person is allowed to share their screen. In the same Meeting Options dialog as in Tip 1, you can set the exact participants that you want to share.
Tip 1 & 2 can be conducted during your meeting as well! During your class, on the top toolbar, click the "..." (More Actions button) and then Meeting Options. You can then change your mute and presenter settings.

Right now in Teams, if students are invited to your class, they are able to join the class and begin it at anytime. To avoid this, change your settings so that you are the only one to begin class.
To do this, edit who can bypass the lobby. This way, students cannot be in the meeting without your permission. In the same Meeting Options as in Tips 1 & 2, change “Who can Bypass the Lobby” to only you.

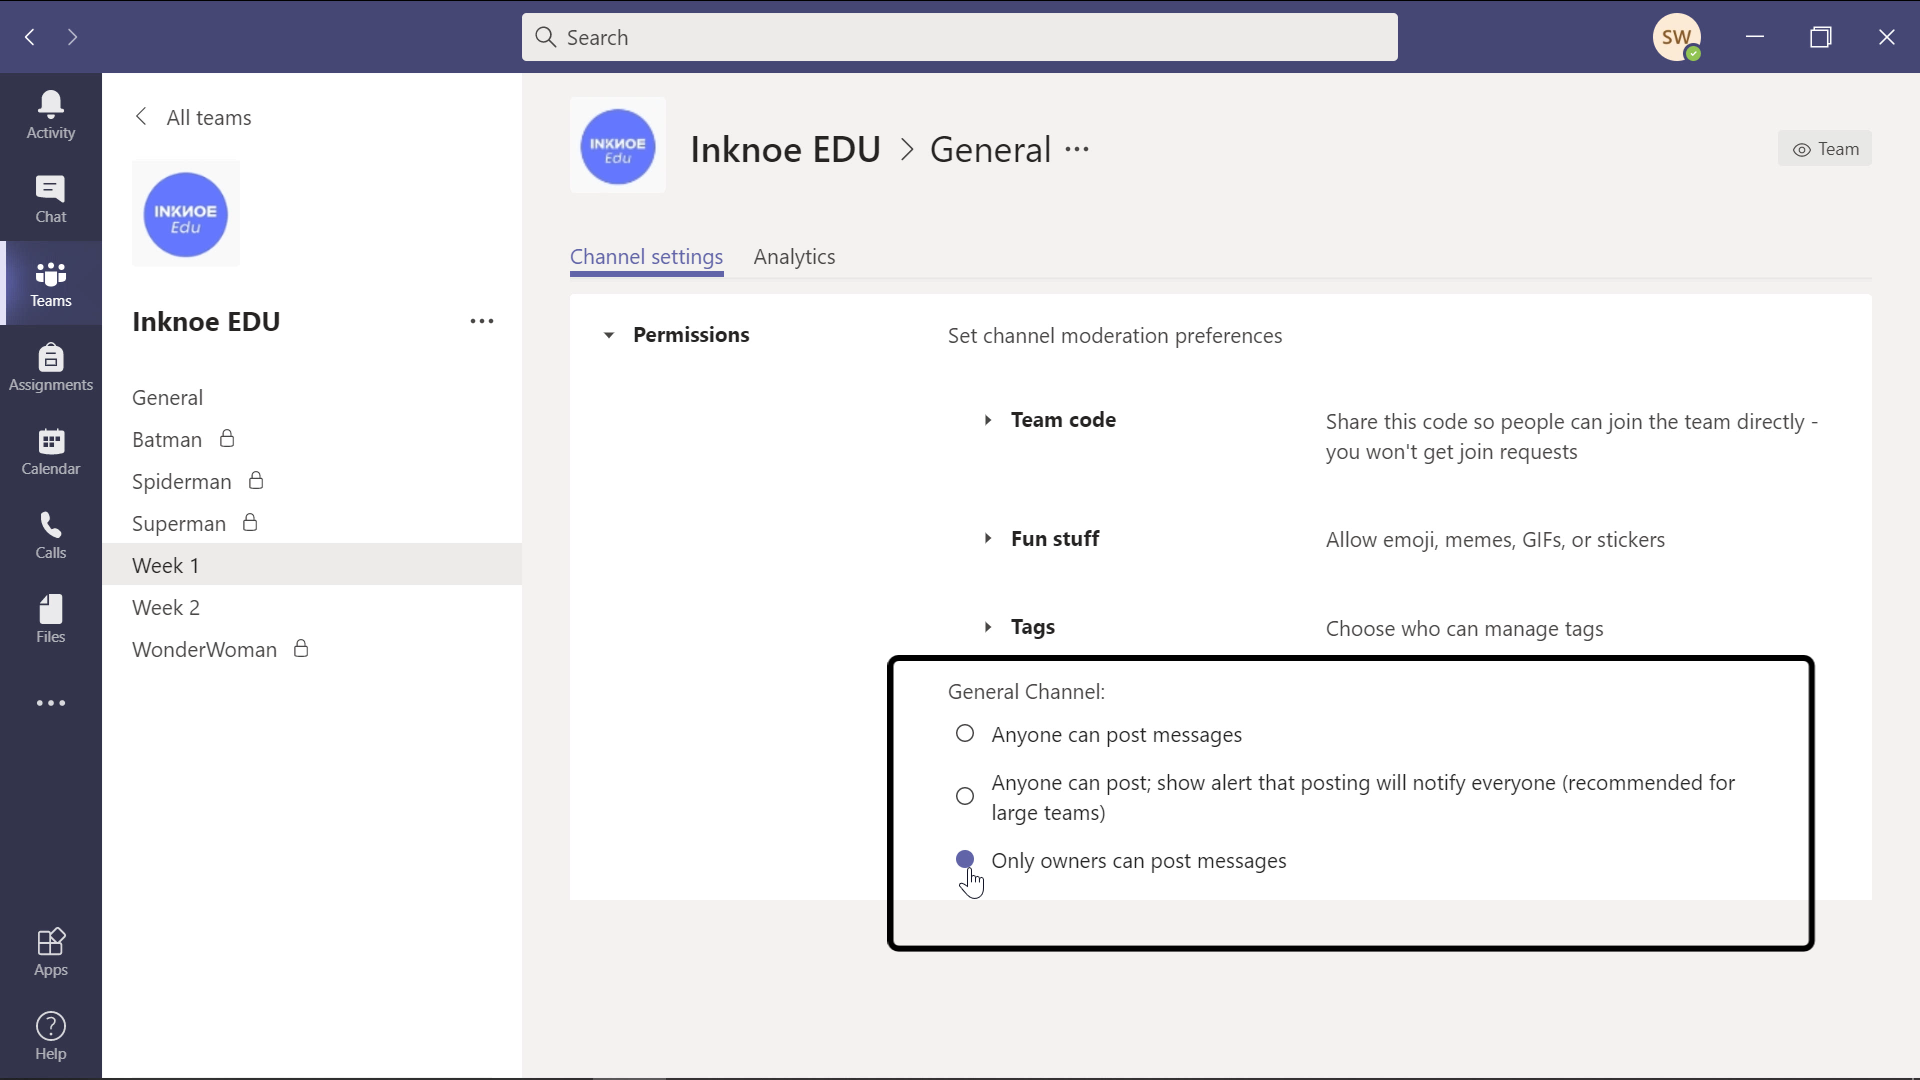
Some teachers want students to be fully concentrated on the class, even if that means not allowing the chat to be open.
To disable students the ability to type in the chat, head to your Channel Settings. Then click on Manage Permissions and check the box so that you are the only one to post messages.
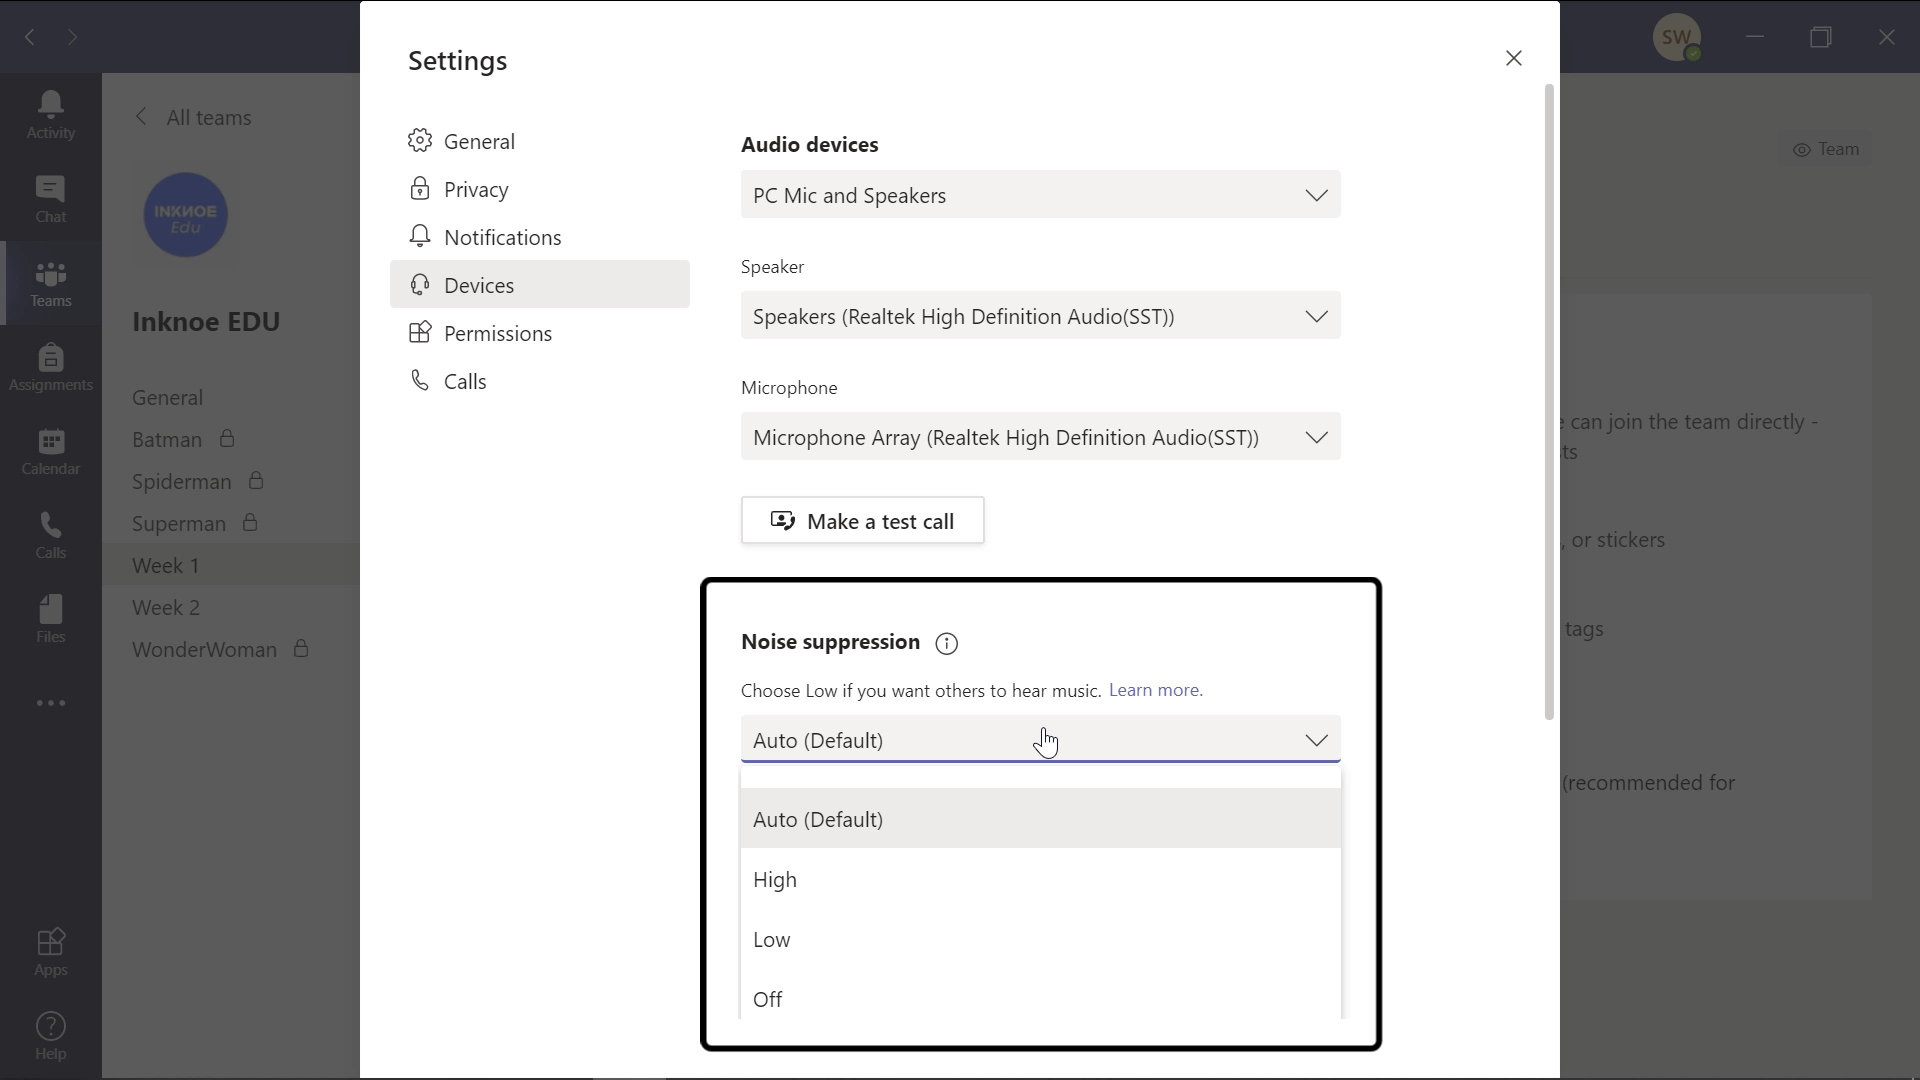
The noise suppression feature of Teams removes background noise during your meeting.
In your Profile, head to Settings, then Devices. You will see a box for the level of noise suppression you prefer. The high setting will block out all noise around you, however, it does take up quite a bit of your computer resources. The low setting will be enough to block out the dogs barking, sirens, or any fans you have in your room.


Microsoft Teams Tips for During Class
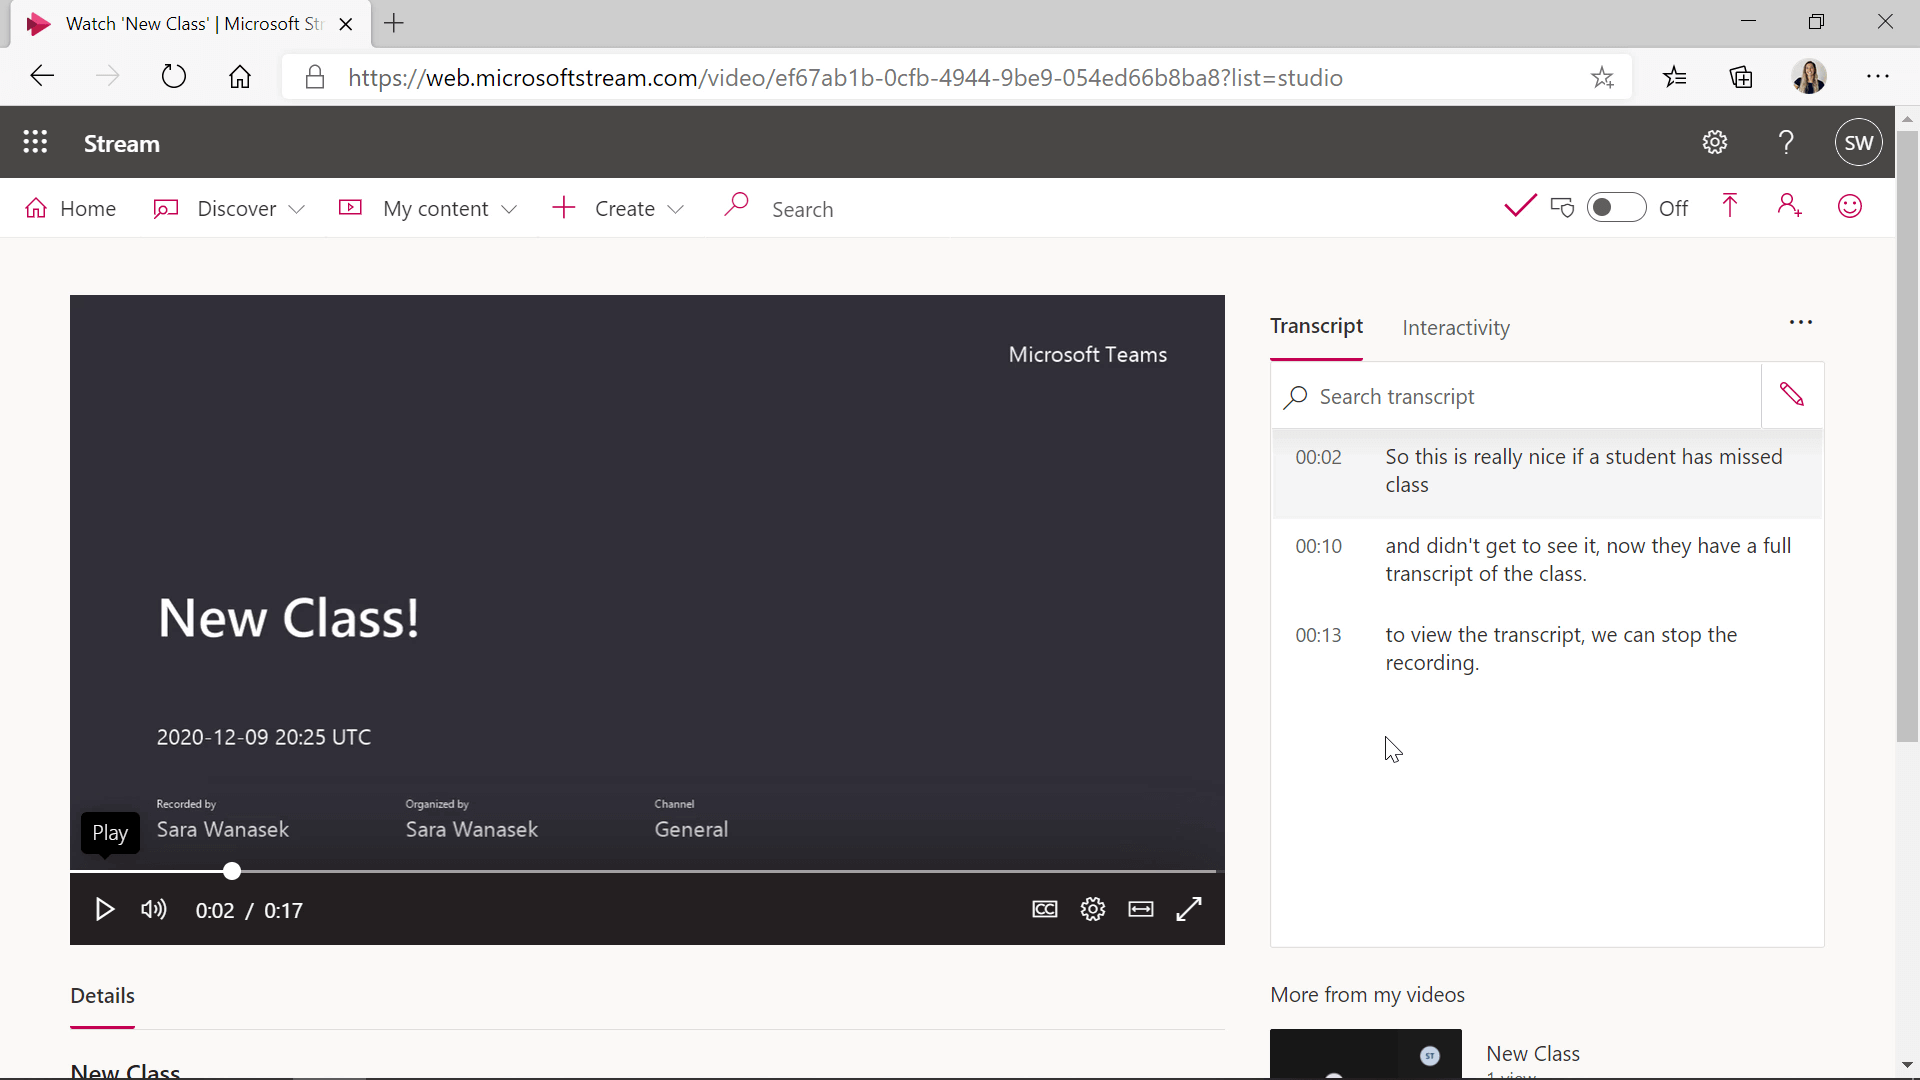
If you would like a transcript of class for yourself or for any students that have missed class you can now do so in Teams!
First, your meeting must be recorded. Then, you can download and open it in Microsoft Stream. From there, you are able to view the transcript and edit any mistakes for a more accurate transcription.
The Spotlight feature of Teams allows you to highlight a particular participants’ video. If you want your students to focus on solely your video instead of viewing everyone in class, you can spotlight your video. This way, students see your video in full screen.
Students are not able to spotlight themselves or other people, but teachers can select a student’s video to spotlight if they are doing a presentation. To use this feature, open the Participant tab during your meeting. Then if you right-click, or click on the “…” on your name or a student’s, you can choose ” Spotlight.”

If you or your students do not have a strong network connection, your audio might cut in and out. To help with this, turn on live captions. This will add captions to the bottom of the meeting of whatever is being spoken.
Your students will be able to see what you are saying along with hearing. In the More Actions button (“…“) click to turn on the Live Captions. As of now, English is the only supported language.

To track your student’s attendance, download a report that tells you exactly when students entered and left your class. This report must be downloaded before your meeting ends!
To download, open the Participant tab, and click on the “…” Then click to download the attendance report as you an Excel document. After the meeting has ended, only your IT department will have access to the report.

This feature of Teams has been much anticipated by so many teachers. Using Breakout Rooms allows you to easily split your class into different groups for students to discuss and collaborate with each other.
To use this, go to the Breakout Room icon on the top toolbar and choose to split your class Automatically or Manually.


Microsoft Teams Tips for After Class or Anytime
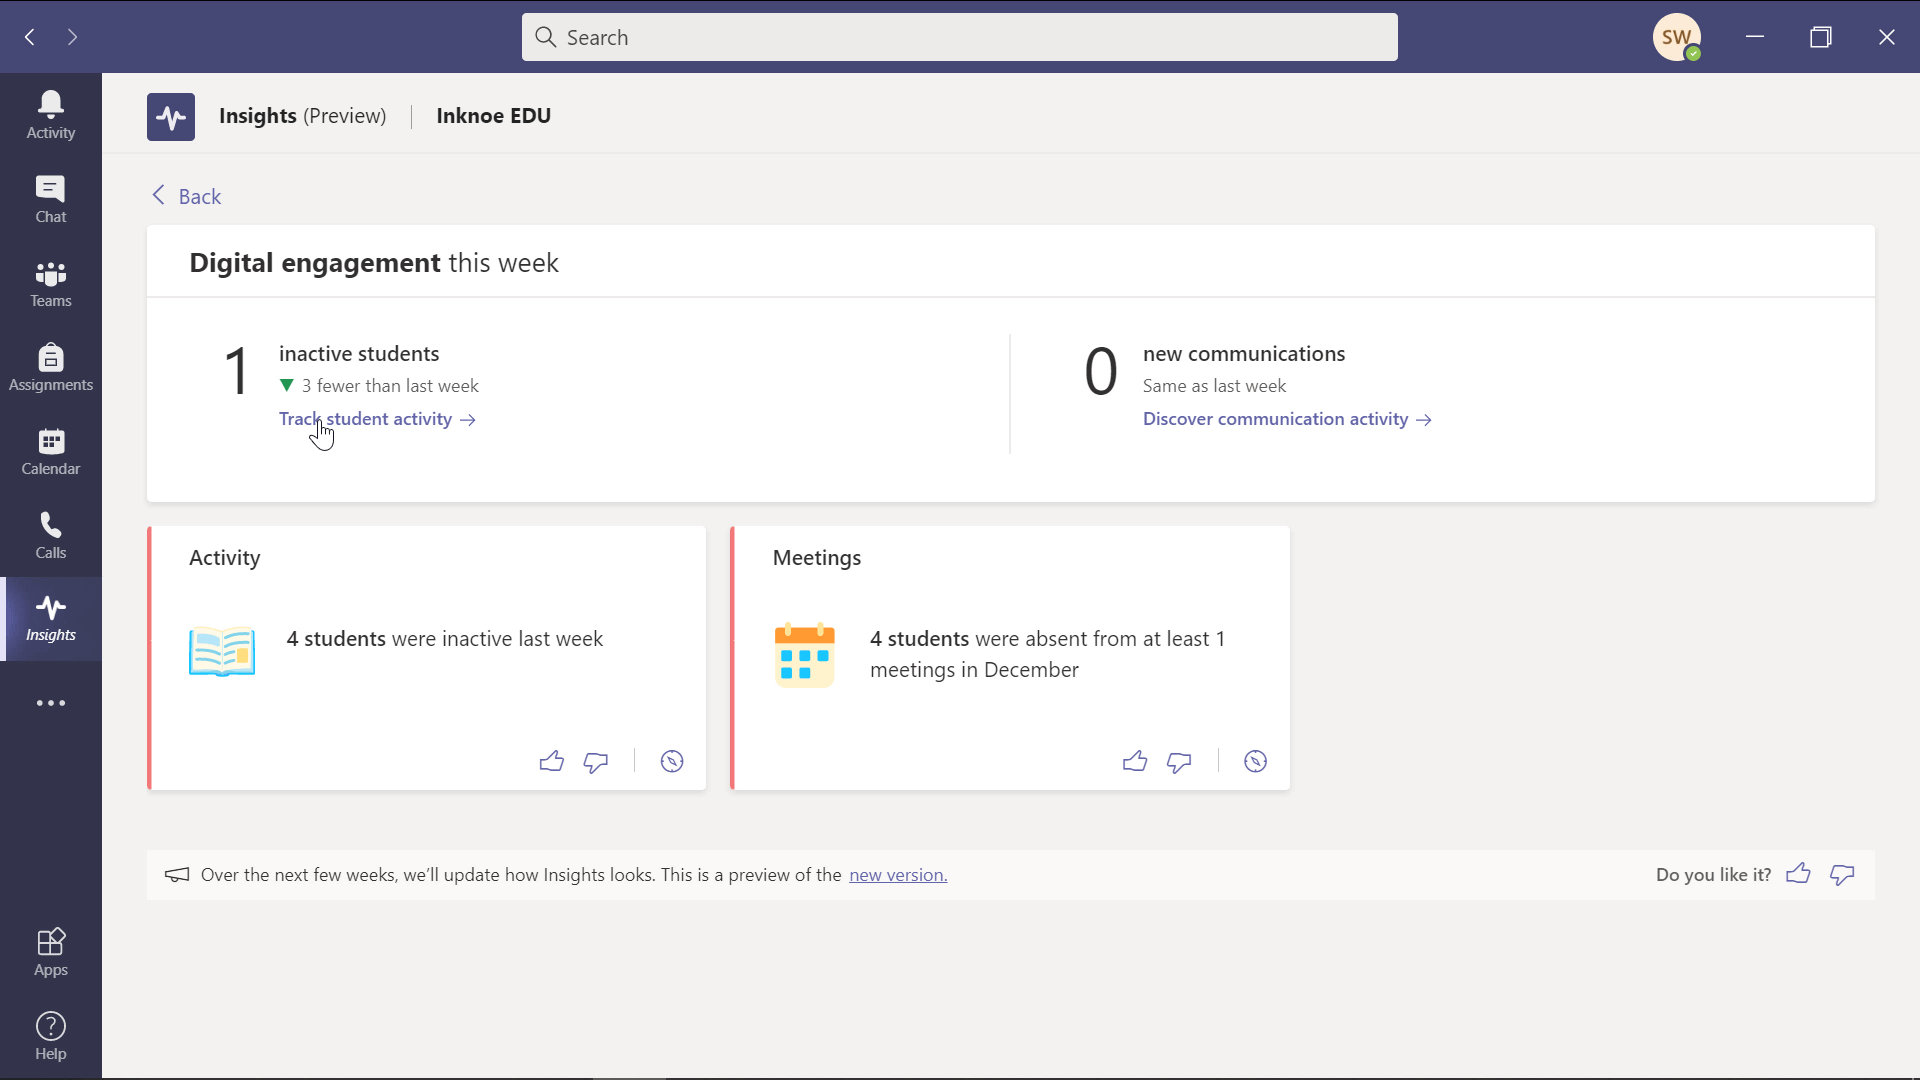
To further analyze how your students are utilizing teams, check out the Insights tab.
Within Insights, there is a dashboard to view students’ activities. You can view how active students are, where they spend most of their time, and which assignments troubled them the most. This is so helpful to see how your students are doing in your class. Filter these insights by student names, date range, or specific activites.
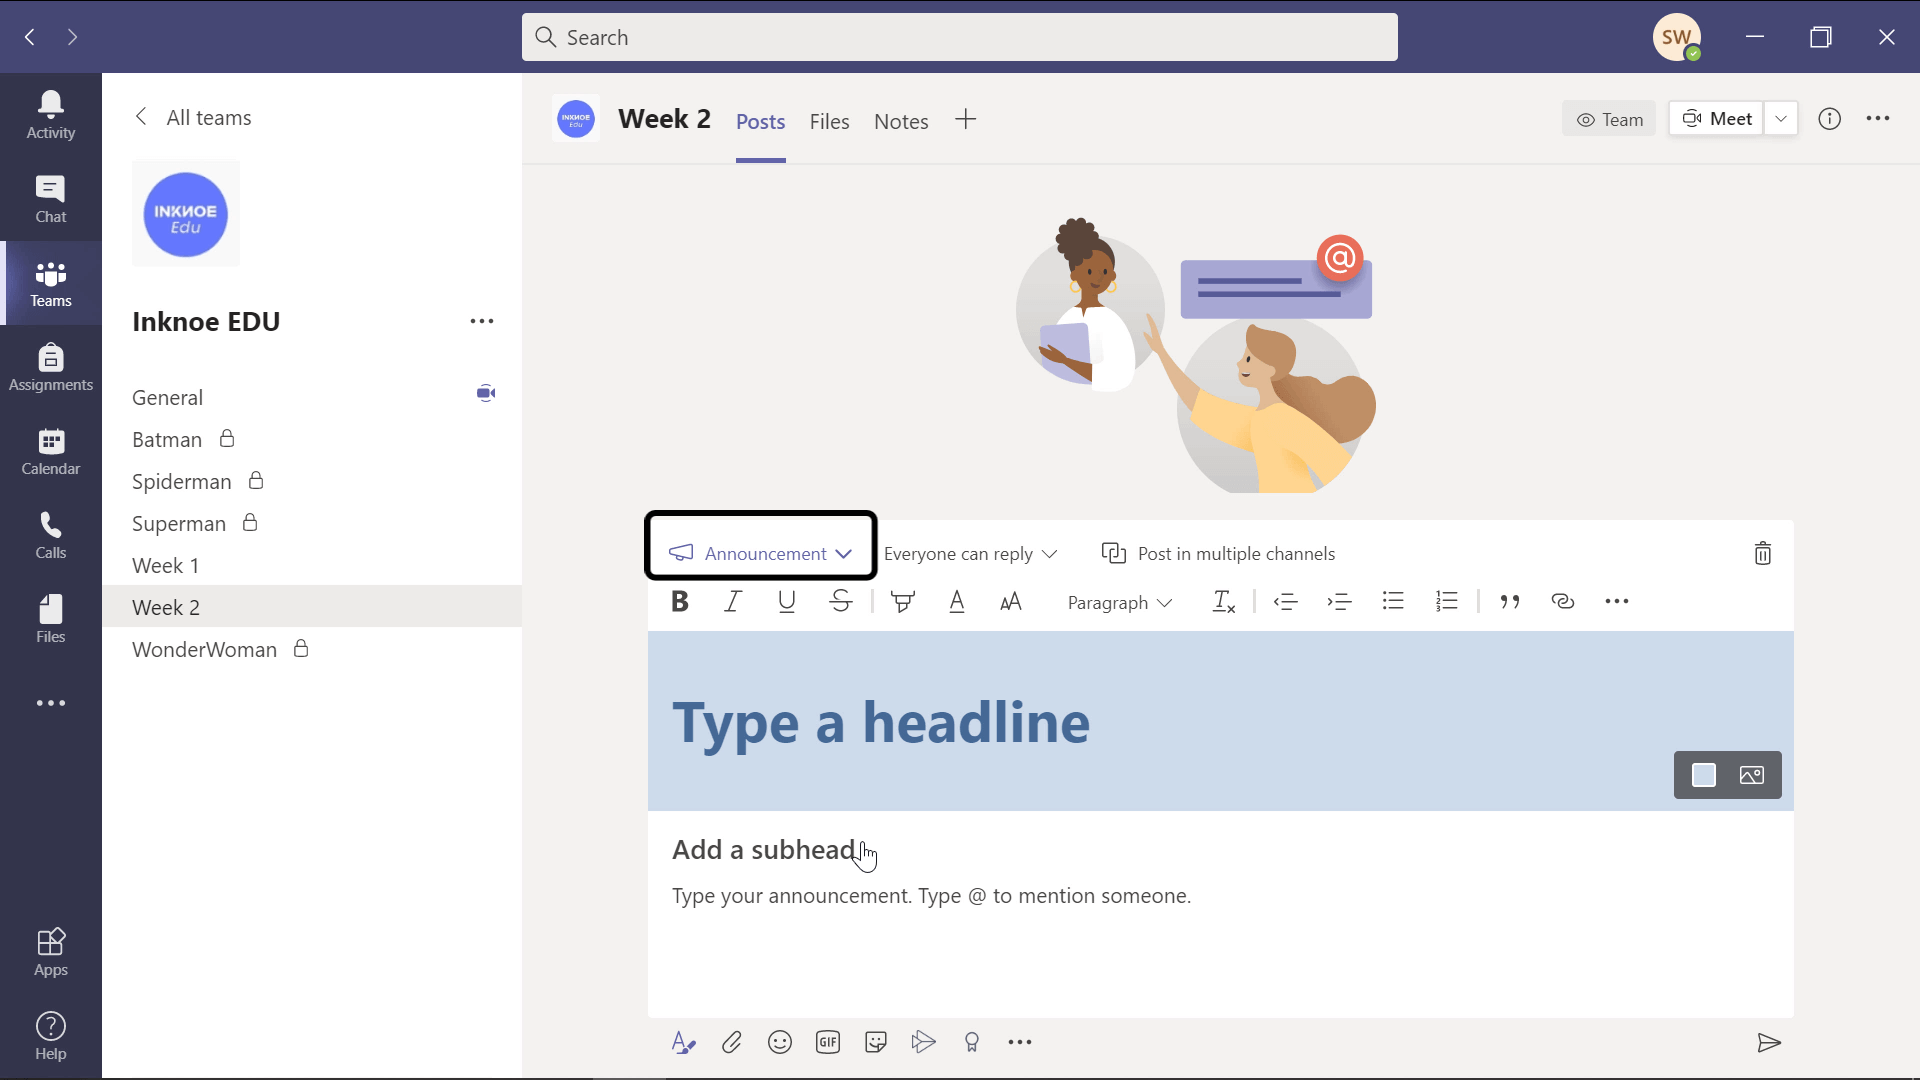
To highlight an important post in your channel, change the post from a conversation to an announcement. This will allow you to have a banner in a different color to make your post stand out.
To do this, create a new post and under new conversation, click to change the post to an announcement.
You can pin any posts in Teams so that when you click on the channel information, the pinned post is at the top, instead of having to scroll through all the posts to find it.
On any post, click on the “…” and click Pin. To view it, click the “i” to view the channel information. Chat messages can be pinned in the same way to create a list of messages you need to respond to, or that you chat in often. You can unpin any messages or posts when you need to.

Adding Polls to your channel or during a meeting will get your student actively engaged.
Add a Forms Poll to any post. In a meeting, click on the Forms button and add a new poll right into the chat.

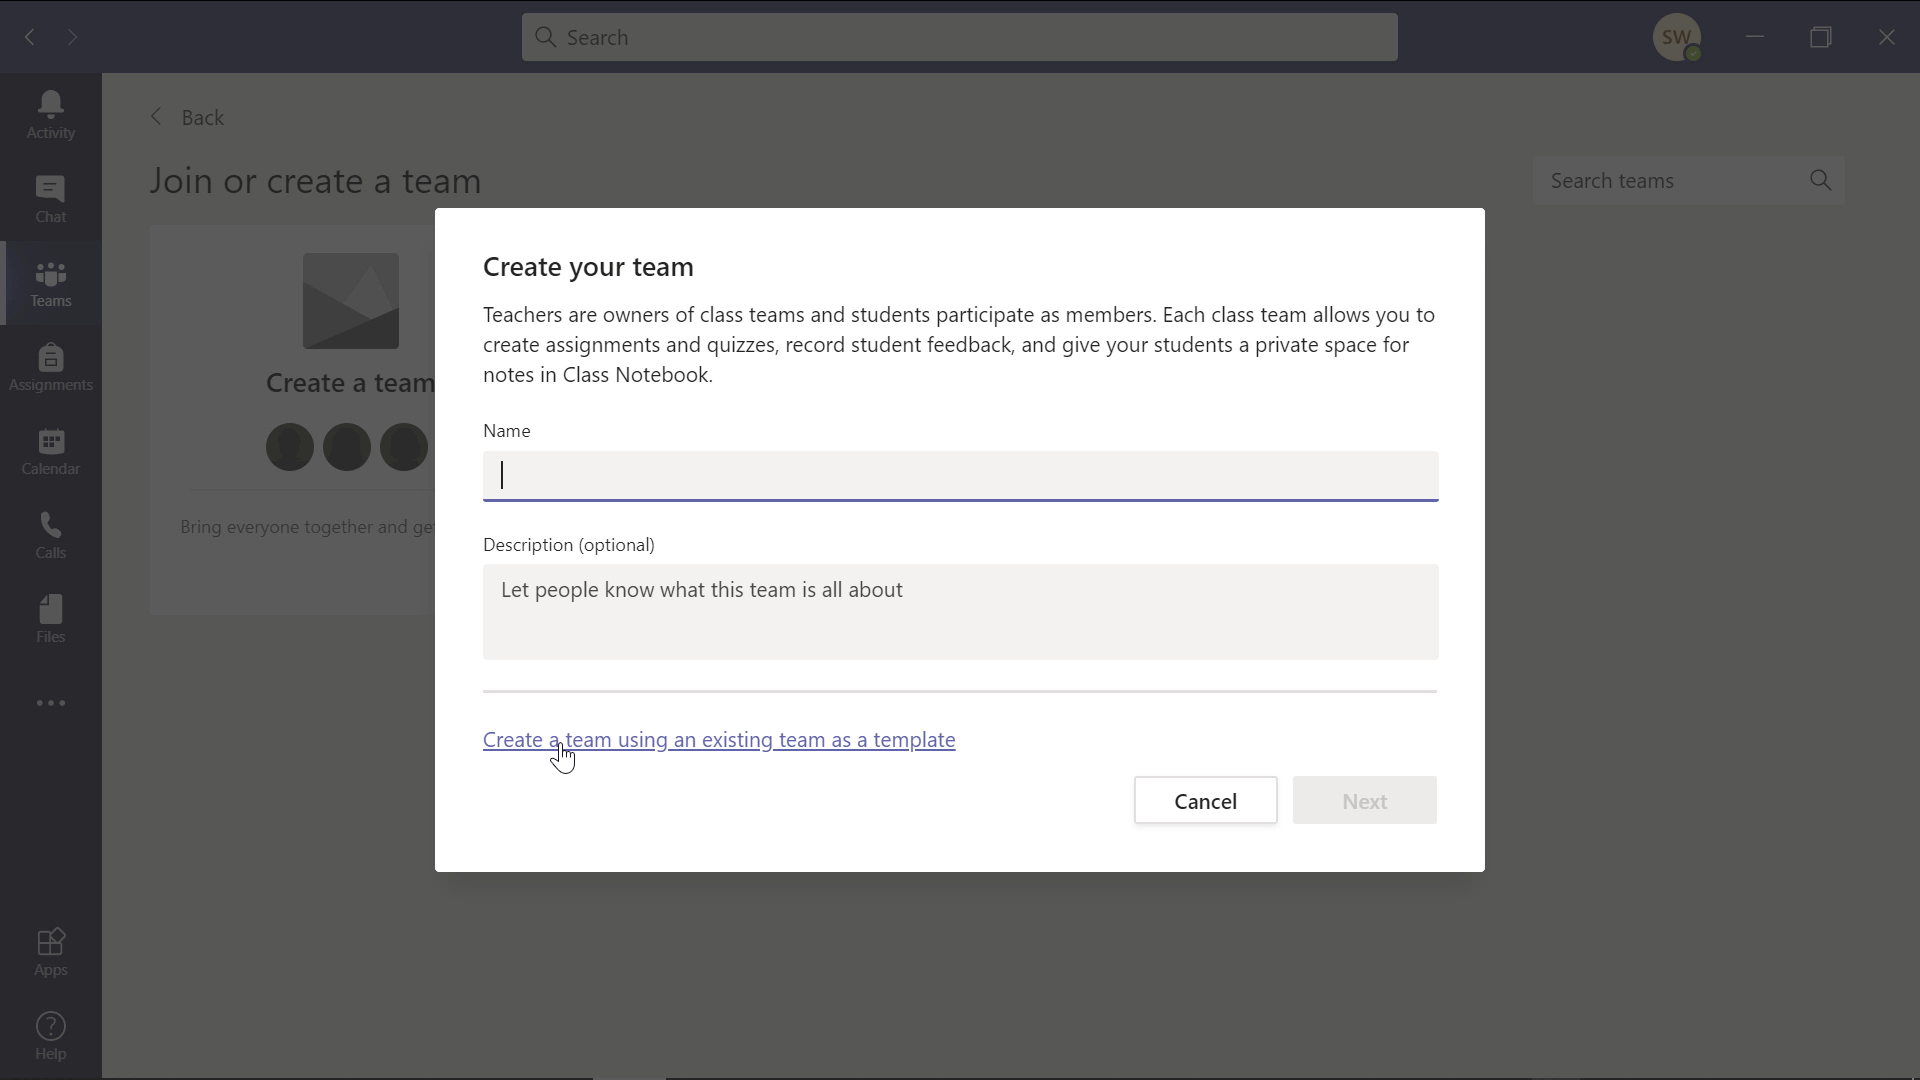
The next time you create a Team, you can use an existing team as a template. For many industries, Teams has preformatted templates but unfortunately, they have not made any for education yet. Hopefully soon!
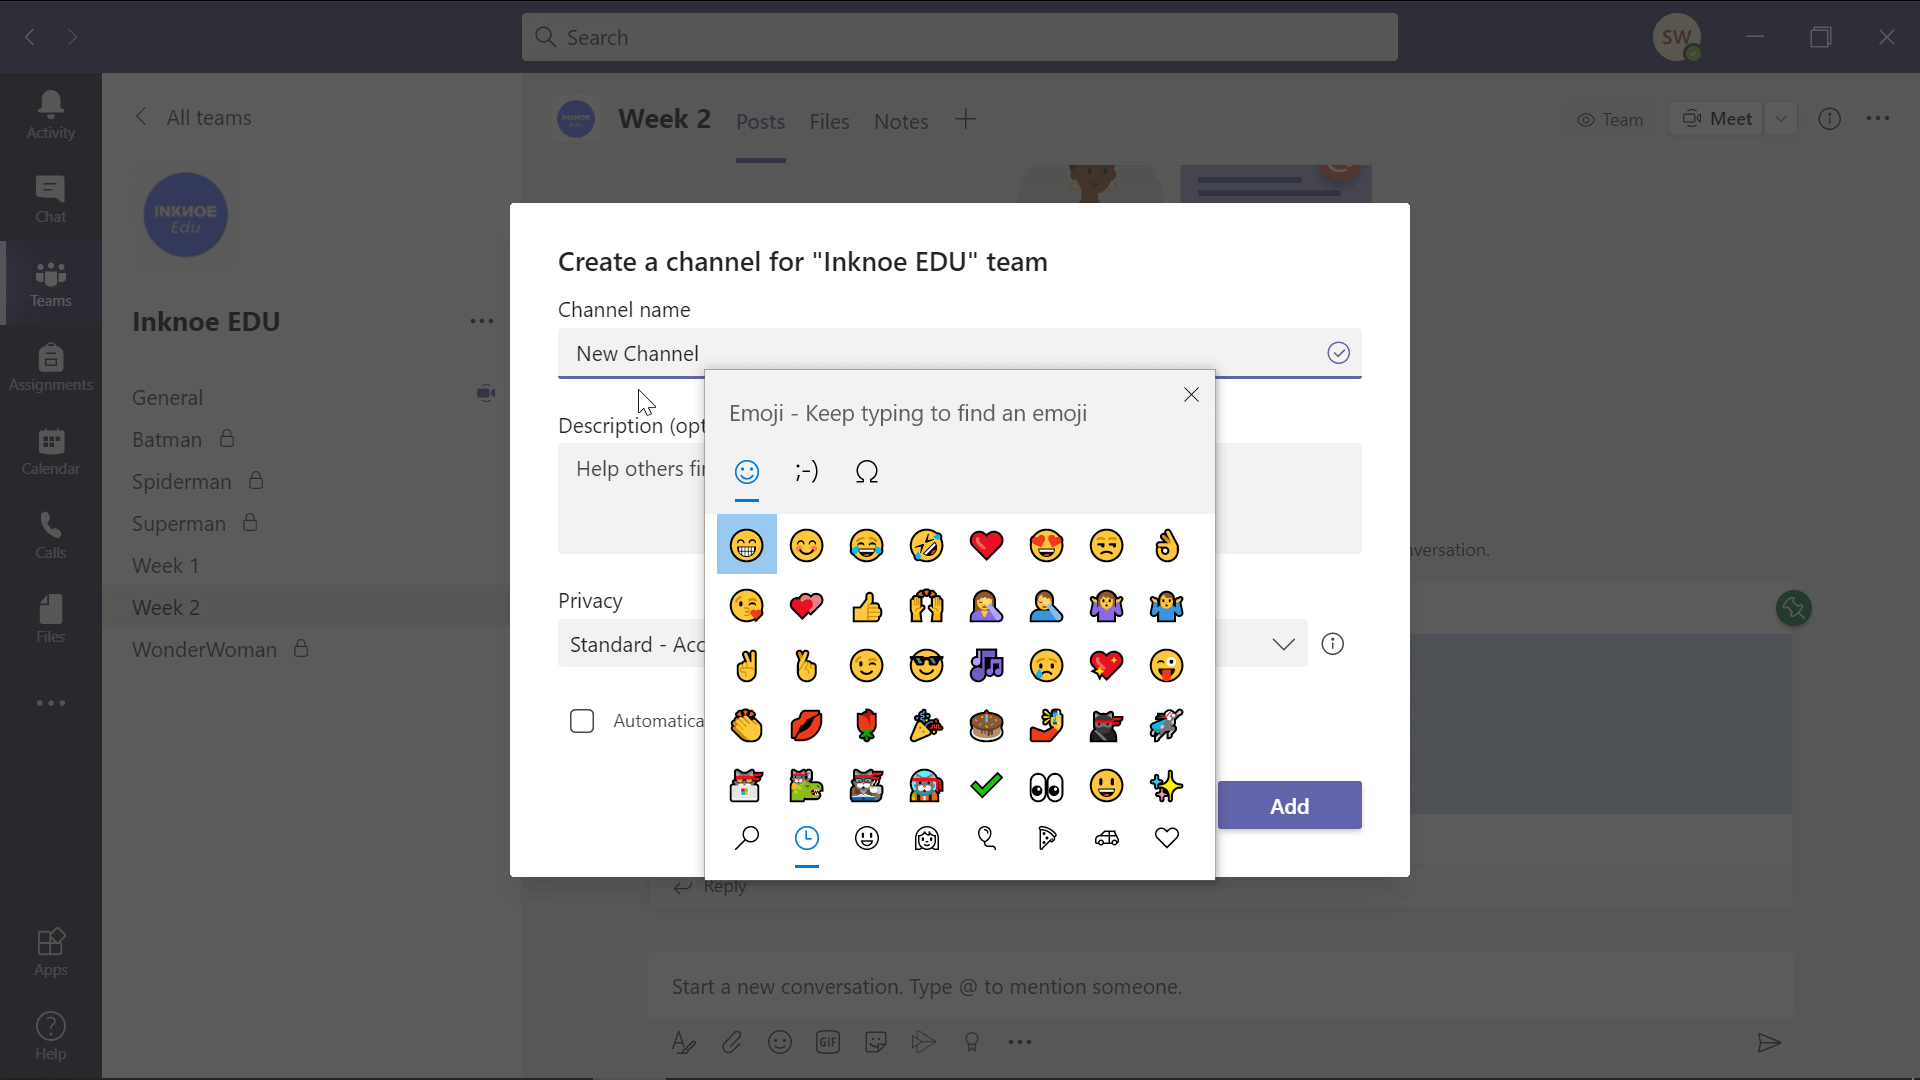
To add an interesting image to your channel or team names, add an emoji! When naming your channel or team, use the Windows key + “.” and your emoji keyboard will open. Select an emoji to add it to your title!
